Friday 31 January 2014

Nail Lacquer UK: Wink At Your Pink


Hello!

Today's post co-incides with the sad news that Nail Lacquer UK is closing, so there won't be any more pretty polishes! I am lucky that I already own quite a lot and I'm still working my way through trying them out. I want to try and wear them all more - I'm getting bad at just swatching polishes, then not wearing them again due to having so many others! All my Nail Lacquer UK polishes are stunning though, and I definitely want to wear them all more.

Today I'm going to show you  Wink At Your Pink, which I got for Christmas from my boyfriend - I sent him a link to the site, and he chose! I love this one and can't believe I've only just got round to playing with it. Wink At Your Pink is a delicate mix of pale pink small glitter, combined with big pink holo circles! I don't have very many polishes with circle glitter, so this was an unusual one for me.

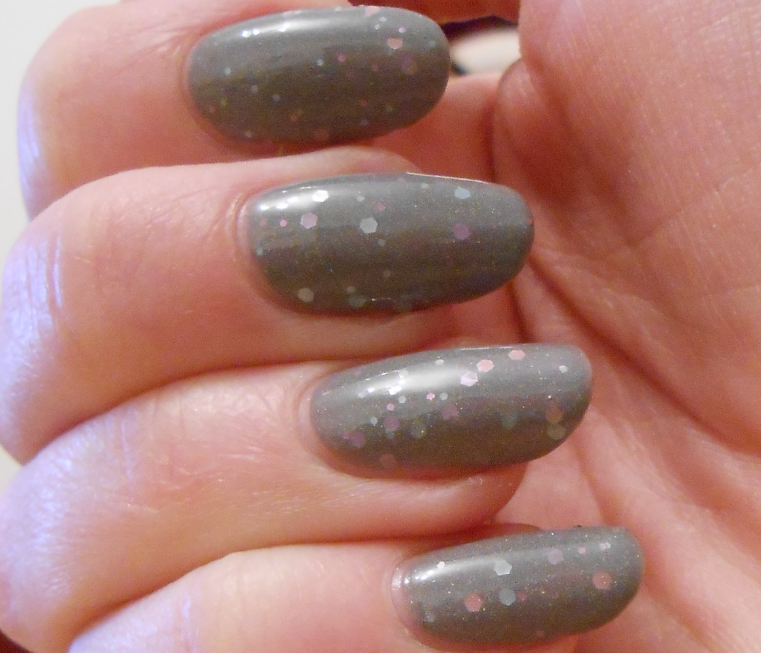
I started off with three coats of Pepperminty by Ciate, from my advent calendar. I loooove this shade, and as I was applying it I thought it looked very similar to the new Models Own green hypergel. It's really shiny, too! Here's a quick pic of it before I added anything else!


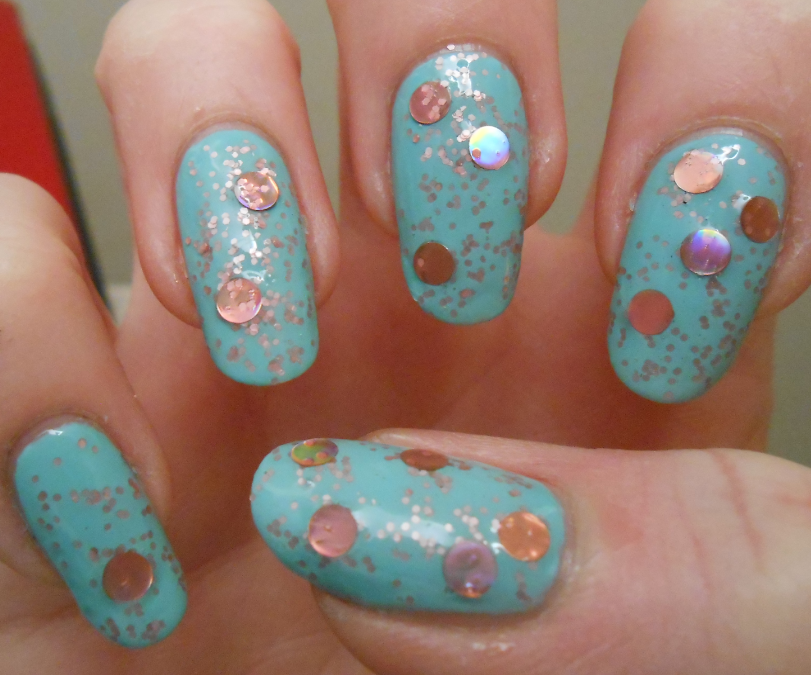
I then added Wink At Your Pink. At first I found it hard to get the circle glitters - I dipped the brush and painted all my fingers on one hand and didn't get a single circle! Once I started to fish for them, I found I could get a lot at once - usually about 5 all clustered together. I found a good method was to dab the circles onto the neck of the bottle, then pick them up individually and place them onto my nail. This was actually really good cos I could place them exactly where I wanted them, and avoid big clusters on the nail.

I added topcoat to smooth the glitters slightly. I looooove how the big circles catch the light! <3

Flash:

 No flash:

In other news, I did finally cave and get some polishes in the Models Own sale! I told myself I wouldn't, as a lot of the hypergel colours are similar to the Gelly's/other polishes I own, and I wasn't too bothered about the advertised 'gel finish' as a good topcoat can lend that look to most polishes. But half price was just too good to ignore, especially when other bloggers kept posting pics of their nail mail, and Models Own were re-tweeting yet more!

Also, I've had a nail casualty :-( on my left hand, my middle nail is cracked about half way down...I have tried to mend with nail glue for now and it seems to be holding quite well, but I'm totally gutted! My nails are currently all at the same length, and at a length and shape I'm happy with, and if this one breaks it'll be about half the length of the others! Bad times, lets hope the glue holds!!


Thursday 30 January 2014

Full Mosaic Nails


Hello! I really liked my mosaic accent nail from my manicure the other day, and wanted to do a full manicure of mosaic-fingers, but with working every day I didn't have time to do them all at once! I made do with doing one or two per day, until I finally did my thumb this afternoon and finished the full set!

The one I'd done first was the blue/yellow/green one on my middle finger. For the other nails, I decided to keep the blue and yellow but drop the green (wasn't sure about it) and replace it with various other colours. I think my favourite combo is the purple/yellow/blue on my little finger, because all the soft pastels look lovely together.

On my last post a few people commented saying they didn't think they'd be able to do this design, so I took a few pics of the 'work in progress' to show how I did it, and that it doesn't look neat straight away- it pretty much looks a mess until the final white lines are added and it's cleaned up!


So after drawing the 'grid' and then roughly filling in the gaps with colour, I went over the grid again with the white pen (once fully dry, assisted by fast-drying topcoat!) and topped with more topcoat, then cleaned up the 'overspill' to neaten them up!

Slow work in progress:


 And the finished hand:

Tuesday 28 January 2014

Pastel Mosaic


Hello! Here is today's manicure! I've wanted to do something like this for a while. I used:

This photo has made me realise how messy and polish-covered all my bottles are, oops. 

I began by painting all my nails with two coats of Utopia, the nude shade. Once fully dry, I then concentrated on my accent nail (which is only on one hand...!) I drew a random shatter-pattern using my white nail-art pen by Barry M. I then used the pastel yellow, blue and green to carefully fill in each shape. I just used the brush in the bottle for this, as it didn't need to be fully exact. Once these were dry (I used fast-drying topcoat to speed this up) I used the white nail-art pen again to go over my lines, which hid any imperfections and make the sections more separated. 

I thought the rest of my nails looked a little plain, so I decided to use the pastel colours again to create a slight gradient on the tips. Last time I did a gradient with pastels, I tried to focus it just on the tips of my nails, but because I was using three colours it didn't really work that way! This time, with only using one other colour with the base colour, I was able to achieve the 'tip' gradient quite well! As usual, I used a make-up sponge for this, and alternated the colours from the mosaic pattern on all my tips. 

I really like how these have turned out, and when I have more time I'd like to try this mosaic look on all my fingers, I reckon it could look really striking! Also, the gradient is more apparent in real life, the pics seemed to fade it somewhat! More pics, right hand with accent nail:


left hand, all gradienty:


Monday 27 January 2014

Tortoiseshell Nails


Hello!

Today's nails are something I've wanted to try for a long time, and eventually decided to do after watching this fab tutorial by xameliax, which was featured earlier in the week on One Nail To Rule Them All, one of my favourite nail art blogs. Amelia used the cling-film method to create layers of colour to replicate tortoiseshell, so I decided to do the same. 

I used four shades, which were Forever (seventeen), Mocha (Barry M), Orange Soda (seventeen) and Rich In Heart (Sinful Colors -a really dark brown/red)


I began with a coat of Mocha, which I decided was the 'brownest' ....I don't have many brown polishes! Once fully dry, I then painted on a layer of Orange Soda. I used a ball of cling film to dab at the newly-applied polish to lift bits off and rough it up a bit. I did this finger by finger. I then did the same with Rich In Heart, and then Mocha again. I also added dabs of Forever (the palest shade) but I'm not sure you can see it much! I just kept dabbing layers until I was happy with the ratio of shades. 

I then used a brush dipped in acetone to mush it up even more, just painting/swiping random parts on each nail to mix the colours and make them look a bit softer. I added two coats of poshe fast-drying topcoat to make them all smooth and shiny. I also needed to clean up around the edges with a small brush dipped in acetone as it was quite messy with all the dabbing! The dark colours were such a pain to clean up, I thought I had done okay but you can still see a bit of mess in my photos - oops!

I'm desperate to add some gold studs, but I've got work this week and I don't think they'd be allowed, and they'd also be more likely to ping off at work. 

I'm reasonably happy with how they look - I think if I'd have had a more red-brown shade, they would have been a better colour overall. I don't know if they look like tortoiseshell but I do like the effect that all the layers have created, and would love to try this with brighter, more clashing colours!


 above: right hand, no flash


 above: left hand, no flash - I especially like how my thumb and ring finger have turned out on this hand!


above: right hand, with flash

above: two more pics, one of each hand, from my phone that show them off in different lights!

Friday 24 January 2014

Magic Goose: I Wished For A Castle


Hello!

Another pretty to show today. This is the second of the two polishes I bought from UK Indie brand, Magic Goose. The first one I bought was a beautiful deep green holographic polish that I wore and reviewed here. The second polish I chose is named I Wished For A Castle, which I think is a beautiful name. This polish is a delicate grey holo, with the addition of little pastel pink and blue glitter pieces, medium and small. It's beautiful!

I first applied three coats of this polish, but it looked a little chunky and topcoat didn't smooth it out as much as I wanted - I like a smooth finish, so I decided to try something else. So for this manicure I applied two coats of Pillow Fight by Ciate, which is a nice medium grey shade. I then applied one coat of I Wished for a Castle over the top. I finished off with topcoat, and this gave a way better finish for me. 

This polish is soooo nice. What I especially like is that I can wear it for work, because from a distance it looks quite neutral, but close up there's the stunning holo, and the delicate glitters too. I really love the combination, it's genius. Sorry I didn't get a photo in the sunlight, it only came out for a few minutes today and I was too busy at work to snap a pic! Here's some I took inside, all with flash, apart from the last one which was without, and hasn't captured the holo but I included it because it shows how many glitter pieces are in there. 


Wednesday 22 January 2014

More Stripes and Studs


Hello!

This isn't the most original manicure today, but I think it works quite well. I was inspired by some old pinstripe nails I did a while back. I've recently created a Facebook page to showcase my nails and go alongside my blog, and I enjoyed looking through my old nail art photos as I uploaded them all. I thought that this pinstripe one looked really effective, while still being quite simple and easy to create.

I already had my nails painted with Amazon Rainforest by Magic Goose (the green) and as I have a few days off I decided to liven them up a bit with some nail art. I freehanded a stripe down the middle of each nail using another rich holographic polish - Rose Bower by a-england. I then carefully outlined each stripe using my black Barry M nail art pen (which is definitely on it's way out - I need a new one!). Still not satisfied, I then added some tiny gold studs at the base of each stripe. I finished off with a topcoat of Poshe, giving a lovely shiny finish!


If you want to like my Facebook page, it's here :-D

Monday 20 January 2014

Magic Goose: Amazon Rainforest


Hello. Beautiful polish to show off today! This is Amazon Rainforest by Magic Goose, which is another UK Indie brand. Amazon Rainforest is a beautiful dark green/teal/turquoise holo, and I looooove it! 

I applied this over my teal Kiko polish, which is always a winner - you can see it on its own here. I actually wore the Kiko on it's own for work today because I was in a rush and just picked something I knew needed few coats and would apply nicely. When I got home tonight, I picked up Amazon Rainforest to try over the top. I used two coats in these pics. Hopefully I can get a photo in sunlight tomorrow because I just love the colour of this holo!

Also, I've not applied a topcoat in these pics as this polish is already super-shiny! I've got one more Magic Goose polish to try out, can't wait to see how it looks, very impressed with this one :-)


Also, I just created a facebook page for my blog. The address is https://www.facebook.com/mymintnails if you fancy a 'like'!

Sunday 19 January 2014

Two Quick Pink Manis!

Hello!

I haven't got a super-exciting manicure to show off today, just two different ones I've worn for work in the past week. Both are pink - I do love pink, and I can get away with it at work as it matches my uniform, as long as I don't go crazy with nail art, which is why both of these manicures are pretty simple.

The first one is a gradient. I started with a base of Utopia by Models Own and then created the gradient using Serendipity by Ciate, a beautiful pink glitter I've been dying to try since I got it as the final polish in my advent calendar. Here's how that manicure turned out...


The pink glitter looked really delicate and sparkly, and I loved how this turned out!

The second manicure, which I'm currently wearing, is just a simple one-polish look (for now!). I wanted to try Princess by Barry M on it's own as it's such a pretty shade. This is two coats. I'm thinking of jazzing this up somehow later on when I have time, but for now it looks really nice on it's own. I love how much glitter and sparkle this polish has!