Hello!
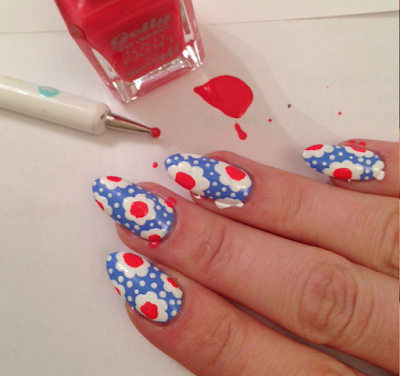
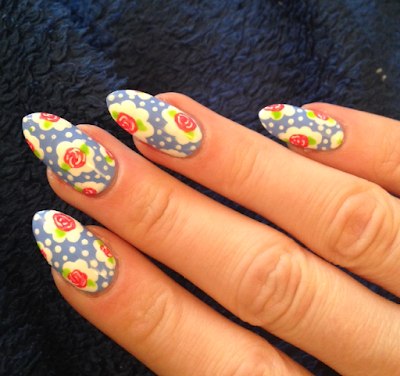
My nails today were inspired by a manicure done recently by Polish Is The New Black. She did a gorgeous blue-based rose design, inspired by Cath Kidston prints. I knew as soon as I saw it that I wanted to give it a go! I also knew that it would take a while, but I found some spare time last night while I was watching telly, and did the design myself.
My base was Blueberry by Barry M. I kind of wish I'd picked a paler blue!
I then used Cotton by Barry M and my Models Own dotting tools to create the white 'cloud' shapes (largest dotting tool)....
...and the little dots (smallest dotting tool).
I then took Passionfruit by Barry M and added a large blob in the middle of each 'cloud', again with a dotting tool.
I used a Green Models Own polish to add leaves - these are a bit messy as I did them with a small dotting tool because I'm rubbish at using brushes! Because of this they're more like blobs than actual leaf shapes, but hopefully because the design is so tiny it won't be too obvious!
Then I topcoated, and cleaned up excess polish from around my cuticles using a small brush dipped in acetone. Finally, I used my white Barry M nail art pen to add a bit of detail to the roses, and topcoated again!
I'm glad I persevered with these - they didn't look great mid-way through but the end result is really pretty! Thanks for the inspiration, Polish Is The New Black! :-D
Thursday, 14 May 2015
Sunday, 10 May 2015
Electric Nights Swirlies!
Hello!
I wanted to do some nice, bright nails for a trip to London this weekend. I knew I wanted to use my new, super-bright Electric Nights polishes I'd recently bought. These are by China Glaze and they're gorgeous!
I also wanted to try out my new swirly vinyls from She Sells Seashells. I thought I'd combine the two, and came up with this! For all nails I started with a white base - I used Cotton by Barry M. Once this was dry, I topped my ring finger, little finger and thumb with two coats of the neon glitter.
For the swirly nails, I waited a bit longer until the white was completely dry. I then used tweezers to carefully pull up a swirly vinyl, and stick it down onto the nail, two to each nail as my nails are long! I painted over with the pink, then removed the vinyl immediately. There were some imperfections where the pink leaked a little into the white, so I used a white nail-art pen to correct this before topcoating.
I looooveeee theeeemmmm!!!
Saturday, 2 May 2015
Sheer Tints over Glitter
Hello!
I've wanted to try this 'look' on my nails for a while after seeing others do similar. I bought the OPI Sheer Tints mini collection soon after it was released, but struggled to think of ways to use it in my manicures. The collection consists of clear polishes that are 'tinted' with colour - so you can use them over other colours to alter them, or over white to create a pattern etc.
For this manicure, I started with a base of a silver holo polish, and topped this with glitter. Here it is before I started playing with the sheer tints: (I especially like the shadow of my hand in this pic, haha)
I then got the sheer tints, and dabbed the colours in a random pattern on each nail. I let them overlap a bit to create new colours, and then added topcoat.
The result was a lovely, shimmery glittery manicure!
Subscribe to:
Posts (Atom)


