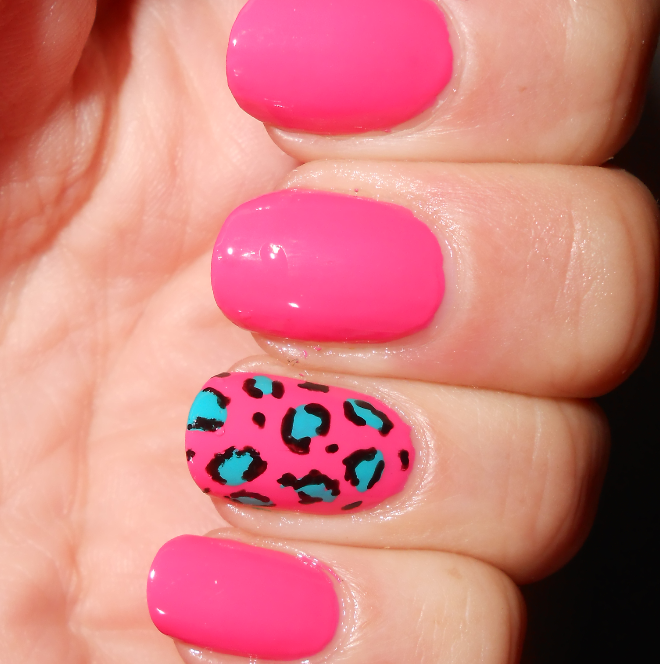
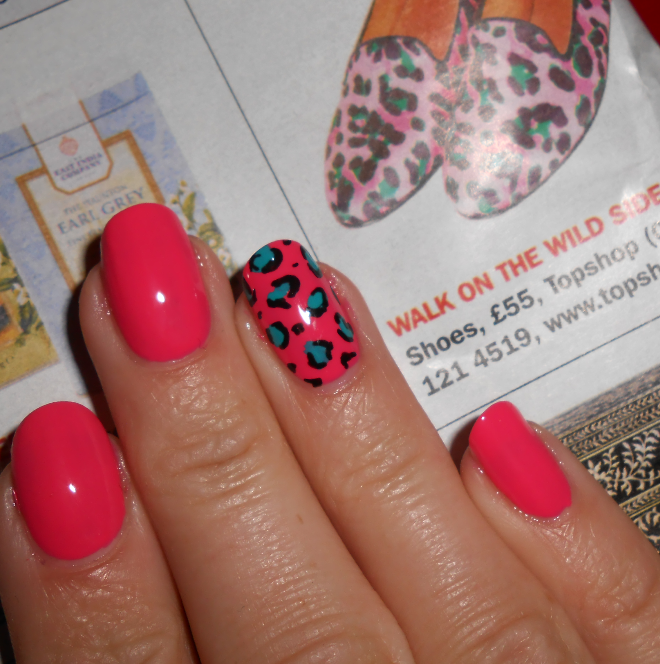
Okay, I admit, I had the idea for my nails before I realised it could tie in with this week's challenge. But pink and leopard print are both girly and fun, right?!
I was actually inspired by a pair of shoes I saw in a magazine. Here they are with my nails! They're beautiful, but I don't think I can justify £55 for some slipper-style shoes when I already have a few pairs that are fab and were only about £20!
I used Barry M's Grapefruit (the pink -again, I can never get over how bright this looks on the nail!) And Color Club's Edie (the green). And of course, Barry M's black nail-art pen for the details. I stuck to just doing an accent nail as I didn't want them to look too OTT!
Hello!
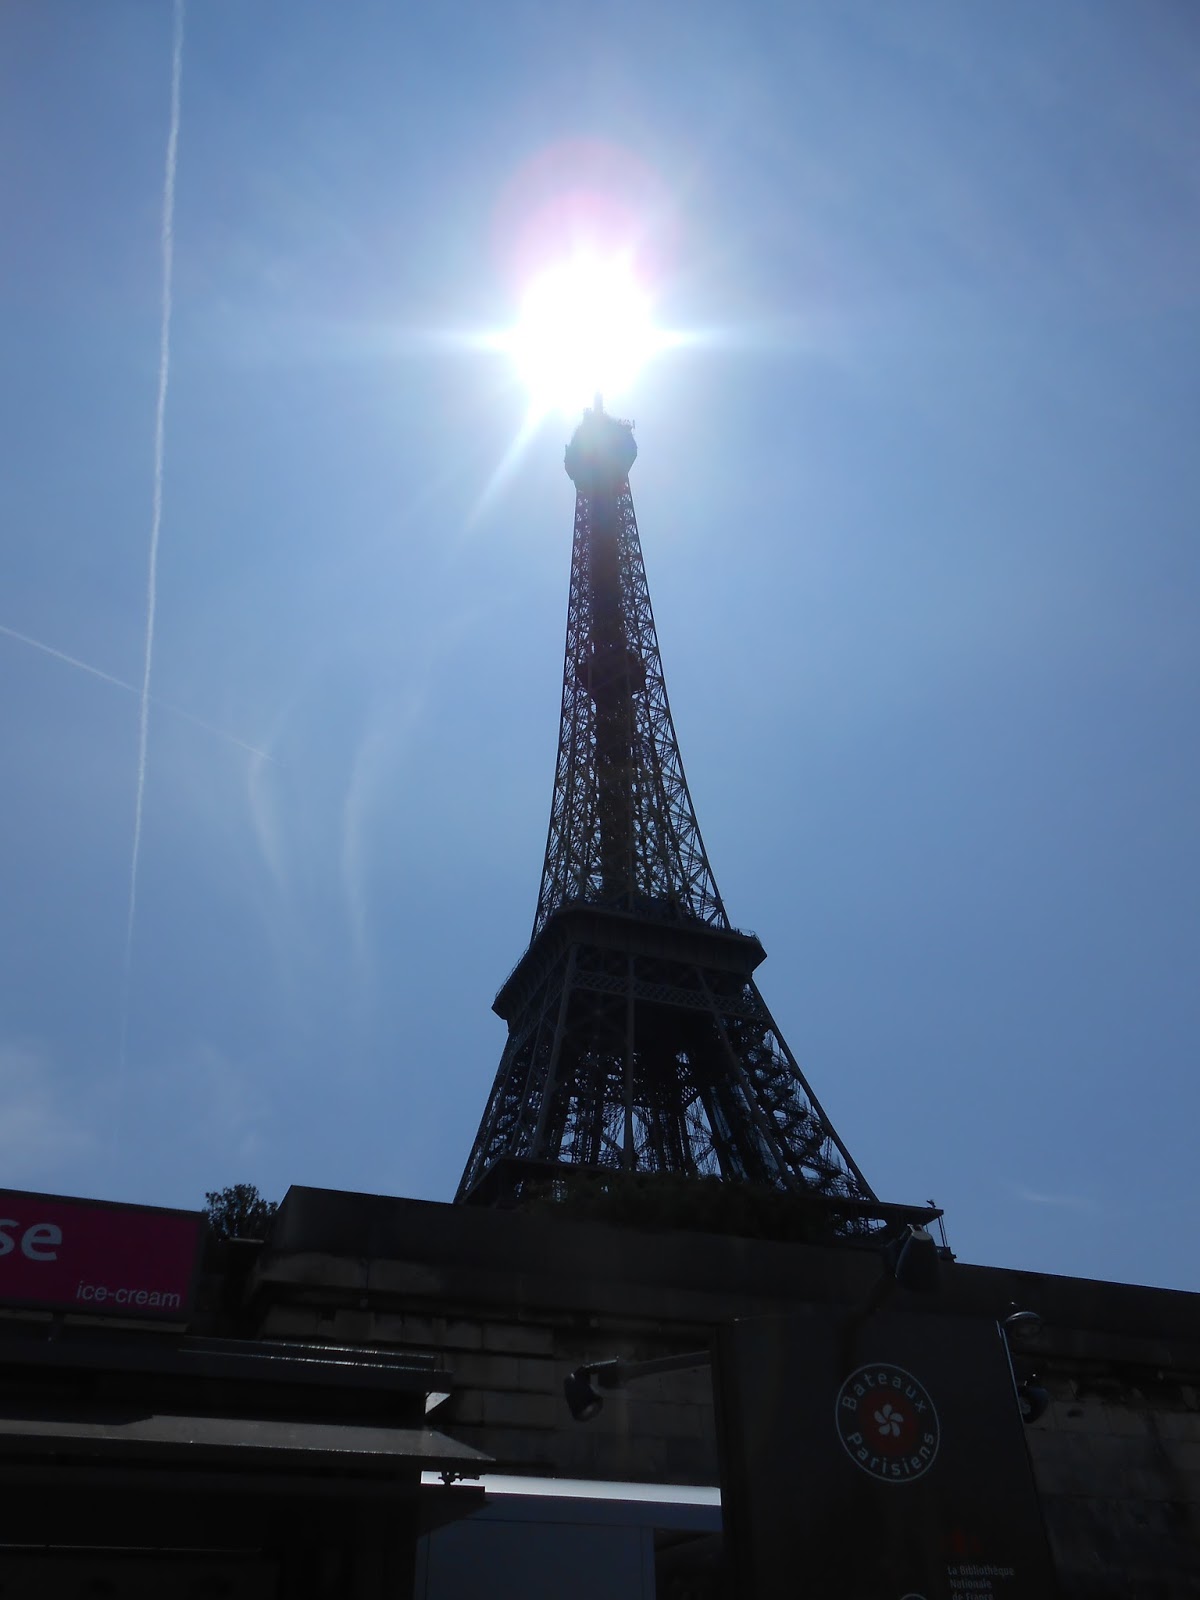
Sorry for the absence - I have been in Paris over the weekend, for my birthday! Now I'm back and was very eager to try out some of my new birthday presents. Here is all the nail-related stuff I got as presents - very lucky girl :-)
There's the Models Own Mirrorball collection from my boyfriend (SO GLITTERY! <3 ) and the Nail Rock kits are from him (and chosen by him) too - can't wait to play with those. The Barry M's are from my fab sister, who remembered which ones I didn't have (and I bought myself the red one at the station over the weekend!) the little kit is from my sister too, handy for my bag! And the Lemony Flutter is from my mum. Yey!
I wanted to wear it all at once, but I don't think I could have managed that! So I compromised, and came up with this:
I used all of these:
:the full set of Mirrrorball polishes, and a related colour from the
Barry M gellys for the base, including two of my new ones, Key Lime and
the LE yellow.
Here (above) are the colours before the glitter. I love them all - so fresh and bright and summery! I especially love the limited edition Yellow! I wasn't sure how bright it'd be without a white base coat (I decided against using one as I was too eager to see the colours!) but it's so bright and gorgeous.
And here (below) they are with the addition of the glitter! Aaaaaaahhhhh so colourful and shiny!! I just can't decide which glitter I like best. They're all stunning combinations, with unique shapes and colours in each one.
And here's a pic of me drinking champagne from a starbucks cup (of course) that shows off the nails I hastily did for Paris - I only had time to do them at St Pancras before the Eurostar, after caving and buying (yet another) Barry M gelly from Boots (passionfruit)...
And a few more pics from Paris.... :-)
My nails this afternoon are cupcakes! I've wanted to do this for ages, and have had a pic saved in my 'inspiration' file, but it's never really seemed appropriate to have cake nails. Well it's appropriate now as it's my birthday tomorrow :-D And doubly appropriate, because this week on the year-long challenge is 'Sugar, Spice and Everything Nice' which definitely includes cupcakes.
I used Barry M's Greenberry and the white Barry M nail-art pen for the buncase, and Accessorize's Miss Sunshine for the icing, with pink dots using the pink nail-art pen and a coat of Claire's holo glitter. The cherry on the top is done with a red nail-art pen (the ones you squeeze) ...I didn't really want a dark metallic red, but my pillar-box red has gone all gloopy (but on the plus side, good for an attempt at sugar spun? Will try!)
I'm going to Paris on Friday and hopefully want to change my nails again by then - not sure whether to stick with something simple as it will have to last 3 days, or do something french-inspired?!
Okay, this isn't actually proper tie-dye but I thought I could recreate the effect by doing a cling-film mani! I was inspired by this shirt (below) that I saw in town recently.
I used a base of Lavender Cloud (white) by Sally Hansen, and then painted on one coat of Blueberry by Barry M. While it was still wet I smushed it with a scrunched-up bit of cling-film to create the patchy effect. I topped off with a few coats of insta-dri... I wanted to add some small silver studs to replicate the buttons on the shirt, but I didn't have any the right colour/size :-(
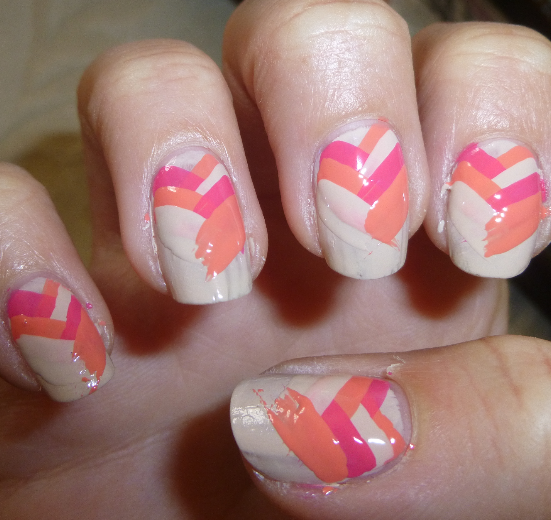
Also, here's a piccie of my fishtail nails from the weekend, along with my friend's nails who asked me to do a quick design for her! x
Hello!
I seem to be really into following other bloggers' tutorials and recreating looks at the moment, mainly due to the awesomeness of designs I'm seeing. I totally loved my Ikat nails from my last post, I only changed them because one chipped, and I wanted something less bright for work (again- failed! these are so bright! I don't know how I thought that this pink and orange, that are practically neon, could be subtle...)
For my nails today, I followed a tutorial by the super-talented Claire over at nuthin' but a nail thing: click here!
I picked three of my favourite gelly Barry M shades to work with, Lychee (nude), Papaya (orange) and Grapefruit (pink). I thought the gelly polishes would work well because you get great coverage in just one coat, which is kinda vital for this method. I started with a base of lychee as it's quite light, then began following Claire's steps, painting each strand of the plait on each nail one by one, then swapping colours and doing the next strand etc.
In progress:
I found the method really simple! It took quite a while but that's no problem if you're chilling out in front of the telly. As the gelly dries quite quickly, I didn't have to wait between 'strands', by the time I'd done each nail with one colour, when I started back at the first nail with the next colour they were dry enough. The only tricky part is keeping each section evenly spaced, and making sure the 'plait' doesn't lean to one side. They are a little wonky, but hopefully not too noticeable if you don't look closely!
I had to clean up quite a bit around the edges, and then finished off with two coats of Sally Hansen's Insta-Dri. I think if I was to do this again, I'd pick three completely different colours. From a distance, I think the pink and orange kind of merge into one.
With flash:
Without:
other hand:
Hello!
For these nails I followed yet another tutorial (I can never come up with ideas by myself!) - this time by the talented Kayla Shevonne - tutorial here. I really love how they look, in all the different colour combinations that she's done. It took me ages to select what colours to use in my attempt. I first picked green and orange, but then at the last minute decided on purple (Barry M's Prickly Pear) and pink (Barry M's Grapefruit). I thought this'd make them less 'in your face' as I'm back at work tomorrow. Actually, they're very 'in your face' but I don't care because I love them soooo much! Such a fab idea!
I used my Barry M nail-art pens for the black and white details - how did I ever 'nail art' without them?!
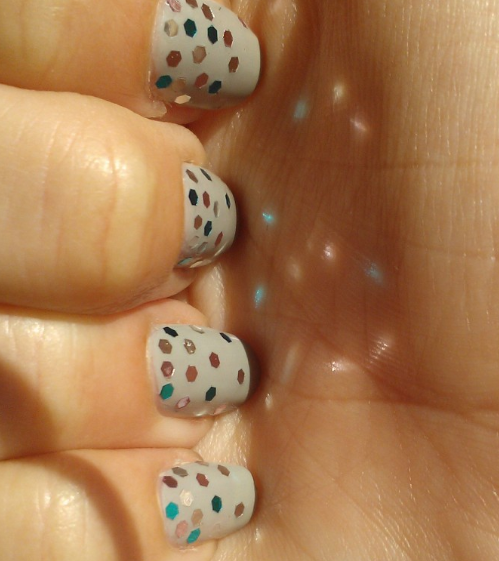
So, I saw these pretty yogurt polishes on Born Pretty and decided to treat myself to one. Except I couldn't pick a colour so ended up getting four! This post is going to show off two of them. They don't have names, so I'm showing you #6 (pink) and #17 (yellow). They're both lovely pastel colours with big chunks of coloured glitter and little silver glitter.
I decided to layer them over yellow and pink polishes to really show them off. On my nails is two coats of a base colour (Claire's Yellow and Glam's Pink) and then one coat of the glitter, without a topcoat. In the pic above, my nails look really bright, especially the yellow! But I think the flash on the camera has helped - IRL they look more like below (without the flash)
I think these are lovely, but perhaps better suited to Christmas, especially the yellow with it's gold and red pieces! The pastel colour that the glitter is suspended in is lovely and summery though, so I don't know! I also want to try them without a base colour to see what kind of colour they can build up to on their own.
I still have the greenish one to try, which has a slightly different make-up which is why I didn't use it with these two. And I have lots more nail-art ideas I want to try - ahh so many things I want to do!!
Today is kind of a cheat post, but I'm so excited about my new polishes I had to post! This morning I finally recieved 3 of my yogurt polishes from Born Pretty. I've got one more to come (I accidentally ordered more stuff!) but I'm so excited about these three - they look amazing!
I also got a tip-off from a friend that Poundland was selling OPI so went for a little look today. I didn't find OPI (well, I did, but only crackle polishes) but I did find this beauty from Revlon in there - it's called Popular and it's so pretty! At only £1 I had to buy it. Here are my buys:

Despite being so excited, I'm going to keep my 'Glinda' mani on a bit longer. It has lasted sooo well! Random placing is definitely the best way to go with glequins! A few have fallen off, but it doesn't matter at all because they're meant to look randomly scattered. If they were in a line or whatever and one fell off it'd be glaringly obvious, but you can hardly tell where the gaps are. Really pleased as well that I've had two days at work (and two showers/hairwashes which usually messes with my nails) and they're not chipped or worn or peeling off AT ALL. So I'm going to wear them a little longer. The glequins are so shiny in the sun, throwing sparkles everywhere! I can't stop looking at them. Here's some pics from today...
Keep an eye on the blog because hopefully tomorrow or the day after I will have pretty yogurt nails- really can't wait to try them out!
X
Hello! I had a vague idea of what I wanted to do with my nails tonight, but the idea didn't actually come together until I had got out all the things I knew I wanted to use. My fellow-challenge-blogger Naileymabob reminded me that this week's challenge (I know I keep forgetting!) is Inspired by your hero, so I decided to tie in what I already had in mind with someone I looove!
This is Glinda, from Wicked the Musical :-D
(my fave Glinda played to perfection by Dianne Pilkington, even though she's moved onto Mamma Mia now)
I decided to make my nails really sparkly as I'd enjoyed using glequins in my previous manicure (I've noticed I tend to stick with a certain theme or style for a while, like I will use the nail art pens again and again for a few weeks, then it'll be something else that takes my fancy!). Glinda is very sparkly. She is my hero because she's so misunderstood in the musical, and even though Elphaba comes across as the main hero of the story, Glinda's story is so sad too. She wants to help but she doesn't have Elphie's courage to stray away from what's expected. I love Glinda, she's just so cute and innocent (especially when Dianne played her). She's also my hero because she loves pink and sparkling things!
For this manicure, I used:
* Dorien Grey (Sally Hansen)
* pale pink, blue and silver glequins (Born Pretty)
* Insta-Dri (Sally Hansen)
+ another clear topcoat to stick the glequins onto (I don't use insta-dri for this bit as it dries before you've got all the glequins stuck down!)
The pink/blue glequins were chosen because I thought they were Glinda-ish colours. She wears both pink and blue sparkly dresses throughout the show. Pretty! Again, I changed what I was planning to do half-way through. I was going to completely cover an accent nail on each hand in glequins, but I liked how the "gradient" of randomly placed glequins looked that I just did it on every nail. Placing things to make them look truly random is haaard! I wanted them to sort of taper off towards the top of each nail. Hopefully I've achieved what I wanted.
Hopefully also, they'll be "plain" enough for work - I know they're sparkly, but our uniform is grey and pink(ish) so I reckon they'll blend in - at least more so than neons would do (I'll save that for my days off again). Sorry for the massive post, hope it makes up for the briefness of the previous one! Here's some more pics with/without flash because I couldn't decide which showed them off better. x
Hello!
Today's nails were inspired by this manicure over at Polish All The Nails. Go and check out her blog, she does amazing things with glitter!
I created this look using w7's Spearmint (the base) and glequins from Born Pretty Store. I applied each piece with a dotting tool, sticking it onto a wet topcoat. I was going to do one finger fully covered in glitter, but I chickened out! It was hard enough to get the rows in straight lines!
Quick post to show you how I've toned down my bright neon gradient mani ready for work tomorrow. This is the first time I've used striping tape and it's actually worked! Sooo fiddly though... I want to try again with more contrasting colours, but I don't know if I want to faff about with the tape again any time soon!
Had a fab, hot day today at The Great Yorkshire Show. There was even a stall offering stamping manicures (didn't look great though!)
Hello!
Tonight I've created a gradient using 4 bright neons. :D I wanted to do a neon design as I'm not at work tomorrow so it's my chance to have some bright nails! I decided on a gradient because I couldn't decide which colour to use. Here are the polishes that feature (the orange was newly bought today)
I'm not going to go through the names of them, because only the first one has a proper name!
I started this mani with two coats of white. Once this had fully dried I painted all 4 colours onto a sponge, in order. I then dabbed/rolled the sponge onto each nail. I kept repeating this to build up the colour, which you need to do as it starts off really faint. I'm still not completely happy with the brightness (I wanted them to appear more neon, like in the bottles) but I couldn't build it up any more! I think they'll look more bold and bright when not sponged on, which I'll definitely try another day as I have a few more design ideas using the neons. Anyway, I finished off with a topcoat as usual to smooth it all out.
Also, these nails definitely look better from a distance, I'm not happy with how they look in these pics :-( but they look okay IRL!


