Hello!
This design was inspired by some nails I saw recently on the WAH Nails Instagram feed. They always have some really funky designs going on, and although these are a bit plainer, I liked the nude paired with the black and white, and the fact that there were french tips AND half-moons. Although they're a bit bold for work, I thought I'd try them anyway! Here's the WAH version:
I used Baby Doll by Ciaté as my base shade - it's kind of a pastel peach colour and is from their Dolls House collection. It's a nightmare to apply due to it being matte finish, and is so streaky even after a second coat, but luckily a third coat evens it out. I was originally going to try a gradient with this and a few other of the dolls house shades, but because they dry so quickly it was too hard to do and I got annoyed and decided to do this design instead! As usual for freehand stuff, I used my black and white Barry M nail art pens.
Also, go and give Ciaté a like on Facebook, apparently they're giving all their followers a free polish when they get to 100,000 - a bit ambitious maybe as they're only on about 35,000 at the moment, and I dunno how they're going to give away 100,000 polishes, but still - sounds good if it happens!
Hello! I've done these nails today as it's nearly Valentines Day! Plus, it was a good excuse to try out the third of the three hypergels I got from the Models Own sale. This is Pink Veneer and it's my favourite of the lot, which I'd decided before I'd even put it on my nails. It certainly didn't disappoint - I love baby pink polishes and this is definitely my new favourite. I didn't have any issues with application either, although I applied it carefully as I know others haven't found it the easiest to work with.
I then used my Barry M pen to draw loveheart-shaped tips and fill them in. I've seen this style elsewhere and I've always wanted to give it a go! I would have liked the tips to be darker pink rather than black, but I'm neater with pens and only have black or white! I finished off with a coat of Sally Hansen Insta-Dri, my favourite topcoat ever! I wondered about adding studs or glitter, but I've held off for now - I quite like the simplicity of these.
Hello!
I don't really know what these nails are or what I wanted to do! Last night after trying a few things, I again couldn't come up with anything nice, but didn't want to go to work with bare nails 'cos they look horrible! I decided to just do a simple french mani - I just used white polish and swiped across the tips of my nails. I wore these to work today, and when I was home I got doodling with a black nail-art pen. I first was only going to add the black line under the white, but then I ended up adding the black spike too. Not sure if they look finished or what they're supposed to look like, but these are my nails today!

Also, I've had a rather exciting evening! I saw on Facebook earlier this month that Indie polish maker Kim who makes Nails Inspire polishes was going to be having a stall at a school near to me. I wasn't sure about going along because I don't have a connection to the school so didn't want to look/feel like a weirdo! But me and my mum wanted something to do so we went along, and the fair was fab! It wasn't like a fair for schoolkids with hook-a-duck etc, it was like a proper local crafts fair. It was sooo busy but I eventually found Kim's stall, which was overrun with people interested in her thermal polishes, pretty glitters and CUSTOM made polishes that she was making right at the stall.
Here's what I bought, after a lot of deliberation:
Aren't they stunning!!! On the left is the thermal polish that I wanted the most, Fairy Lights. I specifically went for a pink thermal, so yay! On the right is Strawberry Jellie, a fantastic shade of pink with holo glitter. So so pretty, I didn't plan to get it but knew I had to have it as soon as I saw it! And in the middle, last but not least, is the mini custom glitter topper that Kim made for me at the table. I chose a dark rich pink, a turquoise and a larger kind of colour-shift glitter, which were all mixed together for me. And what a beauty it's turned out to be!
I literally cannot wait to try these, but I'm resisting tonight - 1 because it's late and 2 because I'm only going to work tomorrow - I want to save them until I have a special occasion to wear them on, because they deserve to be shown off.
Kim was lovely, her stall was very busy with lots of interest from both adults and children, and I'm so pleased she was getting a lot of custom!
I decided on this design after I created my zebra-print tips a week or so ago. I wondered if I could do it again but with leopard print tips. I was stuck for a base colour, and in the end settled on my trusty Dorien Grey by Sally Hansen. I love this polish, but it takes an aaaage to dry! Anyway, I chose this because I'm still at work (day 8 of 9 today!) and I wanted something quite plain, otherwise I reckon I'd have picked yellow or something.
After the grey had completely dried, I used my white nail-art pen to draw on the tips. I had to do a few layers as it's a bit see-through with just one. I then used Barry M's Papaya to do random blobs of orange over the white. After this had dried, I outlined the blobs with my black nail-art pen, putting in random gaps in each 'outline' to create the leopard-print effect. I finished with Sally Hansen's Insta-Dri topcoat to seal it all in and smooth it out.
I wasn't sure whether to add a solid black line between the white and the grey... In the end I decided not to as I was scared of ruining it!
Hello (I'm back!)
I returned from Corfu on Monday evening - we had a lovely time! On Tuesday on a trip into the town centre, I ended up coming home with two new Barry M polishes. I needed a new eye-pencil anyway, and as there was the offer to get the free Limited Edition polish if you spent £6 with Barry M, I thought I'd get the pencil and a polish to make the price up to £6 - I chose the new gelly, Guava. I then picked up the pink limited edition polish, just named SLE 2013 A. I think I just loved it because of the pretty lid! Today I've created some nail-art inspired by the zebra print lid, as I've seen others doing - fab idea!
Here is what I came up with:
I needed to use three coats of the pink to get this amount of coverage- I found it pretty sheer in one coat and it needed a bit of building up. I then turned to my trusty Barry M nail-art pens to create the zebra tips. I used the white pen to draw the french tip and fill it in. I did it with the pen rather than a brush for increased accuracy. I had to go over with the white a couple of times for proper coverage. I then topped with a quick-dry topcoat to make sure the white was completely dry before free-handing the zebra stripes using the black pen. My thumbs I had to leave plain pink, because I've had to cut them right down :-(
Anyway, I like these nails! I think I'll use them for this week's challenge, which is Inspired by Summer. The pink is very summery, and the polish is limited edition for summer, so I reckon it fulfills the challenge pretty well!
Here's a piccie of me & my boyfriend in Corfu, I caved after a few days of having bare nails and painted them bright coral, like my toenails!

Loading InLinkz ...
I know I've just done my Easter nails, but I wasn't really happy with them so they came off pretty quickly! I wanted to play again with my glequins, and knew I needed to choose some neutral colours again or it might look too much. I went with my trusty Dorien Grey by Sally Hansen, and started with two coats. I then painted the top of each nail, french manicure style, with Smoke Signal by Seventeen. I didn't bother making it too neat as I then covered up the join with a row of glequins. I used a dotting tool to pick each one up and put it in place.
I finished with a topcoat of Sally Hansen Insta-Dri, which I've already had to buy a new bottle of. My old one (I've only had it a couple of months) has gone a bit gloopy and discoloured. I think this is partly my fault as I've used it over not-quite-dry nails to dry them quickly! I'll try to be more careful with my new bottle, as I definitely can't afford to keep buying a new one every few months!
For some reason I've not managed to make these nails as neat as my last glequin manicure and I'm not as happy with them as I was with the last ones. Here are some pics anyway!
I'm soooo happy with these nails! I've spent about two hours working on them tonight so I'm very relieved they turned out okay.
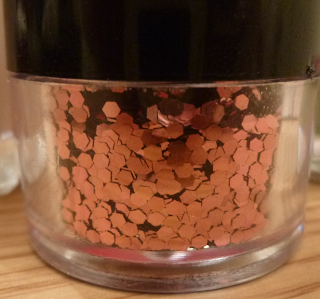
I bought some born pretty stuff a few weeks ago, and recieved it in the post at the beginning of the week - EXCITING! I got a wheel-full of different studs which I'm desperate to try out, and a tub of pink 'glequins' as the Nailasaurus and others are calling them - a cross between glitter and sequins. I'd seen these used in a variety of ways, and was inspired to actually go ahead and purchase them by the fabulous (and famous) Kathie when I saw this manicure. I had seen lots of very pretty ways to use these glequins, but as soon as I saw this manicure on Kelsie's Nail Files I knew I had to give it a go. She in turn was inspired by this look on Oooh, Shinies!
So I think I managed to fit just enough links in that one paragraph(!!). I called this post Tiny Little Pennies after my sister's description of the glequins on this manicure!
To create this look, I used Lychee by Barry M, Spearmint by w7 and my usual base coat of green tea and bamboo strengthener and topcoat(s) of Insta-Dri, both by Sally Hansen. And of course the MASSIVE tub of glequins from Born Pretty - what a bargain, they'll last my whole life!

I painted two coats of Lychee to start. I nearly didn't add anything else because the lychee gelly is so smooth and shiny and flawless! Love it! But I carried on, and used a small nail-art brush to paint the green shape across the top and down one side of each nail. I still find nail-art brushes really fiddly and can't work with them very well, but I persevered as I needed the line to be really thin at the side. It didn't matter if the join was a bit messy/uneven as it was to be covered up with the glequins. I then used a dotting tool to pick up each piece of glitter individually (I tipped a little pile out onto a piece of newspaper for ease-of-access!) and stick them onto my nail, where I'd added a top-coat to stick them onto. I did one nail at a time, adding the topcoat then the glequins. I then added a final layer of topcoat to each nail to seal the glequins in. Ta-da!


