On Fridays, if we both have time, myself and Laura from Naileymabob decide on a theme and both create a nail look based on whatever we've picked. This time, we decided to do things slightly differently; we decided to pick a mani by each other and try to re-create it!
I spent some time going through Laura's Instagram, and came across loads of manicures I wanted to recreate. However, I had to consider that I'm back at work for a 7-day stint from today so I had to rule out some of the brighter and bolder designs, and go for something in paler, more subtle shades.
The manicure I picked to recreate was this one, done 12 weeks ago according to Instagram. Me and Laura live at different ends of the country so hardly get to see one another, but I did actually see this mani in real life when we met up and I remember really loving it - it looked so stylish and clever!
I know that Laura used a gold glitter from Freckles Polish for the chevrons, but I didn't have anything similar really - the only full-coverage gold glitter I own is a chunky, textured one called Charm Bracelet by Seventeen. I do love this polish but wasn't sure how it'd work underneath a smooth polish....
For the peach, I initially wasn't sure if she had used Peach Melba by Models Own or the slightly oranger Papaya by Barry M....I settled with Peach Melba because I love it! After doing the mani and looking back on her Instagram again I realise that I think the polish actually was one of the Models Own 'Polish For Tans' shades - ahhhh didn't even consider that at the time!
The first time doing the chevrons went SO WRONG! I started off with a base of the glitter, and when it was dry (I added gelous to smooth it but it was still pretty rough!) I applied chevron stickers. This is where it started to go bad! Due to the textured glitter, the chevron stickers wouldn't stay stuck down and kept lifting off. Also, the peach (which I was using over the top) wasn't thick enough in one coat to create neat chevrons. All in all it looked rubbish so I ended up taking off the two middle nails and starting again!
This time, I started with a base of peach and added the gold chevrons over the top. I didn't want to do it this way as Laura had obviously used the gold first and I wanted to stay true to her mani, but at this point I didn't have much choice! I also added more Chevrons than Laura did as my nails are a bit longer.
Above you can see the mani of mine that Laura recreated - my gradient leopard print! I love her version and how it looks on her nails. We didn't tell each other until just now which mani we had picked to recreate, and it turns out we both recreated the ones we had worn on the same day back in summer. We are so psychic! Here's the original pic from 12 weeks ago of us wearing the manis together.
And here's my finished 'recreation' mani! I even copied the hand pose ;-)
Hello! Myself and Naileymabob try to do BFF Friday whenever we can but our jobs/lives often get in the way! We managed to fit one in this week though which we were both happy about as it encouraged us both to actually do some nail art!
(I've just found out that Laura can't post her blogpost yet as she's sorting out some family stuff, but if you head over to instagram she's posted her nails there for now!)
This week's theme, chosen by Laura, is Negative Space. As you all know this means leaving some of your nail 'blank' or 'polishless' while still creating a design. I've done negative space nails before here (half moons) and here (single chevron) and really liked the effect both times. I wanted to do something slightly different this time, so decided to add dotted flowers over a bare nail. I decided to do this on the middle two fingers of each hand - mainly because I've got a repair going on on a break on my index finger, so couldn't leave it polishless, so thought I'd incorporate this into the design!!
I already had these two polishes in mind for the design, before I even bought them! I knew they'd look nice together and quite autumnal. This is Mustard and Chilli from the new autumn/tribal range of gelly polish by Barry M.
I also used my prize from a recent competition ran by Orly on Instagram. The winners all received a bottle of Orly BB Creme which is a new product designed to be like a BB Cream but for your nails! The website has this to say:
"ORLY BB Crème is ORLY’s biggest innovation since the Original French
Manicure itself. It’s everything you need for beautiful natural nails in
a bottle. It whitens, it brightens, it smoothes and it protects –
giving your nails an instant make over and a healthy glow. Containing UV
filters, it also helps prevent discolouration of the nail too.
Instantly transform your nails in just two coats. Wear alone – no other
polish needed."
...So basically, this isn't a nail treatment as I first thought, but a polish designed to keep nails looking natural but improve the colour/texture and general appearance of the nail. I was a bit skeptical at first - why not just use a clear or sheer peachy shade to get this effect? But actually, after using this, I think it's rather good! It does everything it says and makes my natural nails appear so healthy - whilst still looking natural.
I reckon this would be great for someone who has their nails bare a lot (for work or whatever reason) but wants to keep them looking nice. Not so great for someone like me who always wears polish, but now I have something to use if ever I need to have naked nails.
So anyway - after that digression - I used this as a base for the negative space nails, which made my nails appear really healthy and clean, and hid any staining from excessive polish use.
I added the flowers randomly using my Models Own dotting tool, and then created a gradient with both colours on all my other fingers. I really love the look of this manicure - I wish I could have done the flowers on all my nails! They look really 70s!
To tone these down for work, I sadly removed the gradient nails and just painted these with the Orly BB polish. I love how it makes my nails look! Although I don't know if I'm keen on having designs on just two nails and the rest plain - people at work thought I'd forgotten to do the rest of them, and also I kept catching sight of the dark red and thinking I had blood under my nails!!
Hello!
This week's BFF Friday theme is: Fishscale nails! Myself and Laura of Naileymabob both made an order in the past few weeks from She Sells Seasells, who supplies fab nail accessories like studs and vinyls. When chatting, we realised we'd both ordered the new Fishscale vinyls, and were both eager to try them out, so decided we'd both create a manicure using the vinyls somehow, and this would be our theme.
Obviously with them being fishscales, I wanted to create something that made me think of the ocean. Luckily, I'd also ordered some seashell studs which are soooo cute, so I used these too. This is what I came up with!
I used Greenberry and Guava and a bit of Prickly Pear gelly polishes by Barry M. On all my nails except my ring finger nails, I created a water marble using these three shades. I was quite proud of this as I've never really done a successful water marble.... and I definitely won't be trying it again for a long time, so much messing about!!
For the accent nail, I started with a base of Greenberry (two coats) and let it fully dry. Can I just say, Greenberry is the most beautiful polish ever! <3 anyway, once it was FULLY dry, I stuck on the fishscale vinyl, painted over my nail with Guava, then used tweezers to remove the vinyl.
Firstly, I was very impressed that the vinyl covered my whole nail - I have had several products before in the past like stamping plates etc that claim to cover a full nail, but because mine are quite long they haven't.... but these vinyls were definitely long and wide enough to work really well!
Something I found difficult was actually getting the vinyl on and off the nail. Due to it being quite a complex shape, I struggled. When removing the vinyl from the backing paper, some of the little 'scales' that were meant to pop out of the pattern didn't, and I had to use a pen to press them out - which was hard because I didn't want to rip or stretch the vinyl. Also when removing it I had to be careful not to stretch it and mess up the still-wet polish. I did manage though, and I think I'll be a lot better at using these next time round having learnt how best to do it!
I wish I'd used more contrasting colours as the watermarble and fishscale patterns are not too obvious unless you look closely - although I do think you can see the patterns more obviously in real life, so that's okay!
Here's some pics with and without flash to try and show the marble and fishscale off!
Hello!
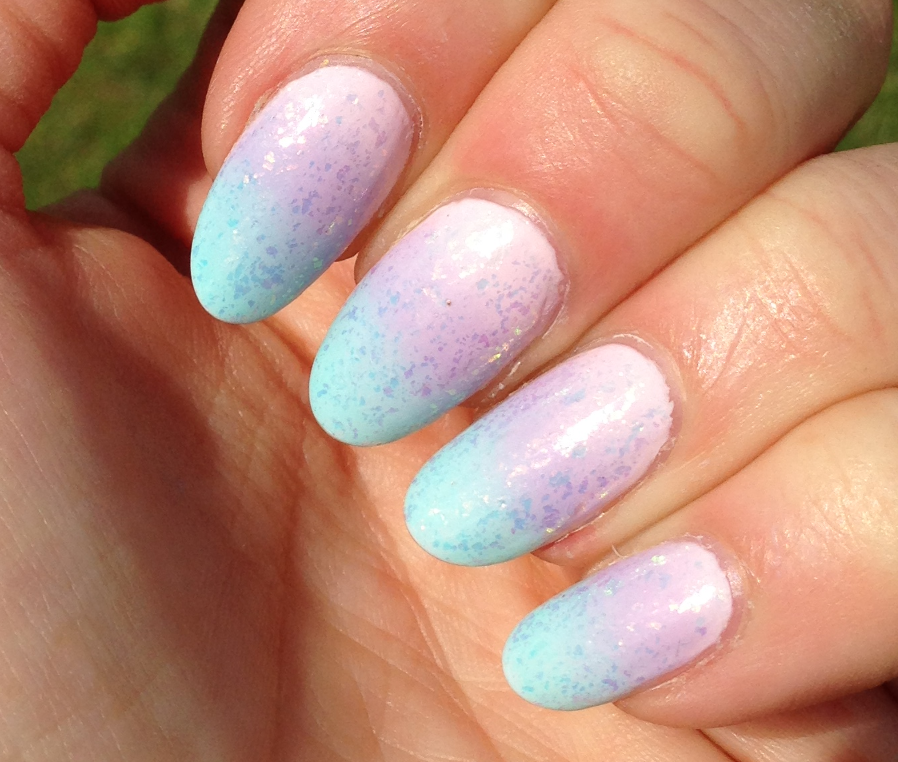
This week for BFF Friday, myself and Laura decided we would do a gradient, as we're loving them at the moment! We wanted to use pastels, and we decided to go for green, pink and purple which worked really well as a combo for Laura last week and I wanted to try it out myself! The only rule was that we had to use these three shades (pastels) and create a gradient, but we could do this however we wanted.
I decided to recreate Laura's gradient from last week as it was so gorgeous! She used pink at the base, purple in the middle and green towards the tip. I used these colours, that coincidentally matched my necklace!
I used my usual method of starting with a base shade of the lightest colour, in this case I picked Rose Hip (Barry M). I then used a make-up sponge to apply the gradient, sponging on a few layers to build up the colours.
To make my gradient a bit different and so it wasn't a direct copy of Laura's, I used a topcoat of "Mermaid" which I bought yesterday from Urban Outfitters. I've always loved looking at the polishes in Urban Outfitters, both the fab choice of colours/glitters, and the chunky square bottles, but thought £6 was a bit steep. However they had some on sale this week... my sister treated herself to a lovely pale purpley-blue that's really opaque in one coat, and I got Mermaid, which is a beautiful iridescent flakie. For £3!
However, applying this made my gradient almost impossible to photograph, and I got so annoyed! 'Mermaid' goes all sorts of beautiful colours but I found it hard to capture, and when I did it kind of hid the gradient! I reckon it'd look better over a block colour rather than a gradient. Here's the best pics of a bad bunch, in different lights...
Hello! Time for another edition of BFF Friday, where myself and Laura of Naileymabob pick a theme and both create a mani. Laura picked the theme this week and it was Stud Crazy which I thought was fab!
I took inspiration from Polish All The Nails who creates all sorts of crazy detailed manis using stud/glitter placement, with whole nails being covered in studs like in the example I've linked to above. I tied this idea in with my new polish from Pretty Quirky which is called Milky Joe and created a stud-filled accent nail to match the polish.
After I uploaded the pics I realised I had neon yellow polish (which I used to fill in the gaps where studs wouldn't fit; the base shade was originally white!) all over my stud finger which kind of ruins the look - it wasn't really visible in normal light,and I'd already taken these off before I checked the pics - rubbish! So - sorry about the mess!
On the whole I'm pretty disappointed with my interpretation of this theme, I've definitely done better crazy stud nails in the past and I think I should have gone for something like this again!
I do love Milky Joe though, I used two coats with a bit of placement needed over a base coat of white. I love all those neon pieces! <3 You can buy Pretty Quirky polish here!
You can find details and more pics of the mani Naileymabob did here - definitely have a look, I adore this mani especially the triangles of studs and that fab accent nail - that was more the look I should have gone for!
Hello! Time for another edition of BFF Friday, where myself and Laura from Naileymabob pick a theme, and both create nails based on it. We don't tell each other exactly what mani we're going to do, so it's always fun to see how the other has interpreted the theme!
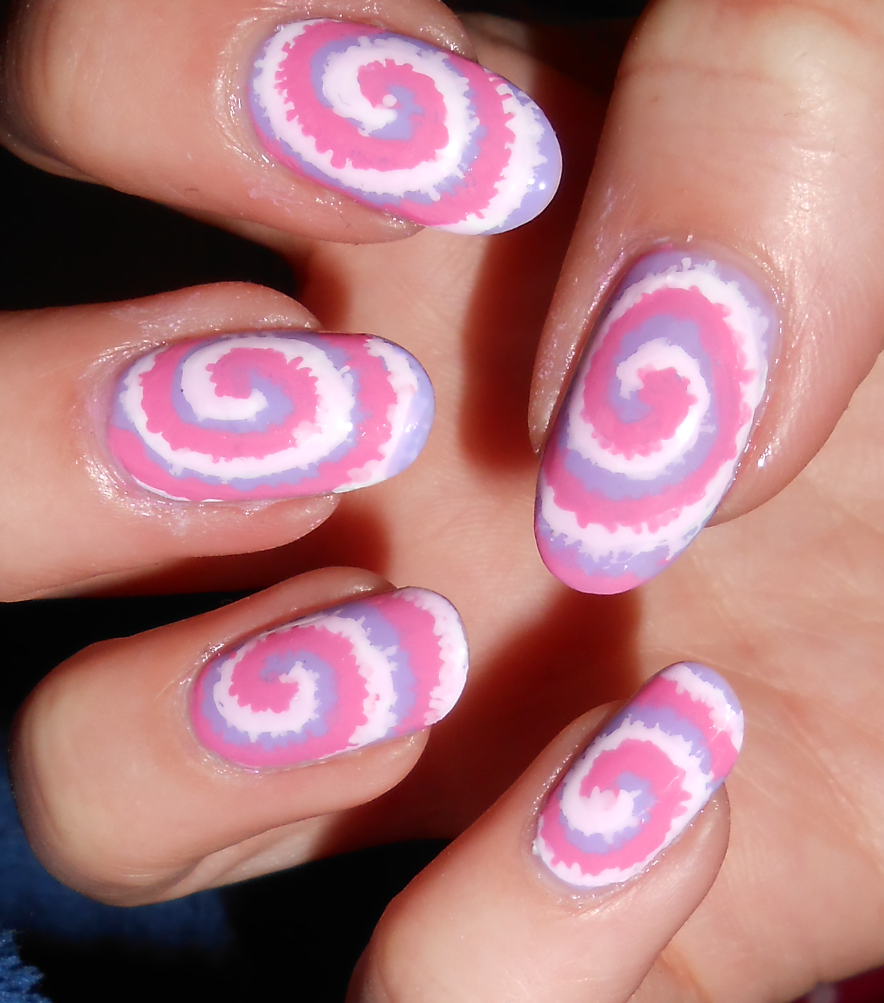
Today's theme is Pink Tie-Dye. I picked the theme this week, as I was inspired by a manicure I saw on instagram by b_jessica_3. So gorgeous! I wanted to recreate this exactly, but decided to replace one of the two pink shades Jessica used with a purple, so I wasn't totally copying! I also initially decided this as I thought it'd make the whole mani more pastel and less bright, but it didn't....oh well!
I started off with a base of Barry M's Prickly pear. This was 2 quite thick coats as it's quite sheer in just one. Once fully dry, I drew on a loose spiral using the white Barry M nail art pen. I then added a pink spiral (also Barry M pen) beside it, adding in 'jaggedy' edges to get the tie-dye look. I had to go over the white and pink again when it had dried as they can dry quite patchy/pale, but it didn't take me too long!
I finished with a topcoat of OPI red/pink sheer tint, 'Be Magentale with me' to add a slight pink tinge to the white and just because I wanted to see how it'd look! I'm pleased with the finished look - it was good that this mani required adding jagged, uneven edges to the spiral, because I didn't need to worry about it being perfect. These especially look good from a distance - so effective!
Check out Naileymabob's interpretation of this weeks theme and her blogpost here!
Hello! Time for another week of BFF Friday - when myself and Laura (naileymabob) pick a theme, and both create a manicure. Laura came up with this weeks' theme which is Geometric Pastels. Fab for spring!
I wasn't sure what I wanted to do, although I did want to use Rosehip and Huckleberry - two of the new spring gellys by Barry M. I wasn't really sure even right up until last night when I started this mani - I was going to do a big triangle at either the base or tip of my nail, but at the last minute I came up with this. It was quite time consuming, but I did it whilst catching up with some TV so it didn't seem too bad!
I started with a base of Rosehip (the pale pink) which needed two/three coats to be fully opaque. I helped this to dry quickly with a quick coat of Insta Dri (Sally Hansen). After waiting a little while to make sure they were fully dry, I drew on the triangles using the white nail-art pen. I filled them in with Huckleberry (the pale blue) using a tiny nail-art brush - I rarely use brushes because I'm not very accurate with them and find them faffy, but in this case I needed something really tiny to get the polish into the little triangles! I went over the blue twice to make it stand out. Once this was dry (again helped with Insta-Dri!) I went over the white outlines of the triangles again to neaten them up. Then my final coat of Insta-Dri to seal it all in!
Pics using my camera washed these out a bit, as you can see in the first few pics, so I've also added some I took with my phone that show the colours and the nail-art off a little better. Sorry for the varying colour/quality!
Naileymabob's post is here - go and check out her post and how she interpreted the theme! X
Hello! Today's BFF Friday (that was supposed to be last week but I didn't have time - boo to me!) has a theme of Tribal/Easter Eggs. It was initially just tribal, but after Naileymabob told me that hers looked like Easter Eggs, I wanted mine to be similar! So the official title for today's theme is Tribal Print With An Easter Twist :-D
My manicure today was actually inspired by this manicure by Nails and Polkadots. I've only recently discovered this blog via instagram but she does some amazing designs - go and check out the blog!
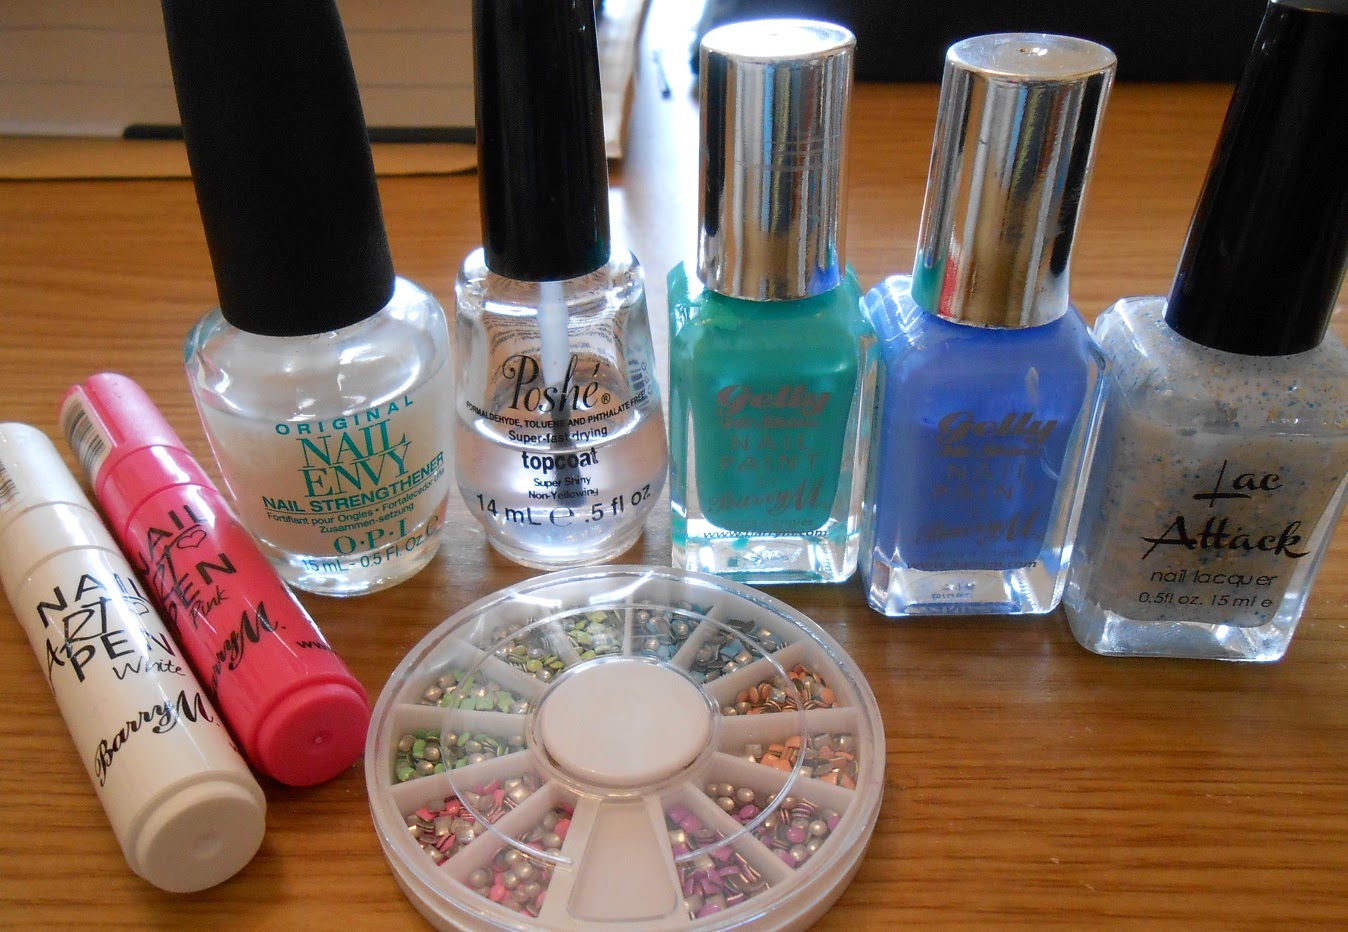
For my manicure, I again used the Barry M pens and some of their Gelly shades. I love their colours, they seem so perfect for spring which is why I seem to be reaching for them all the time recently! I used Greenberry and Blueberry, as well as the pink and white pens.
To create the three tribal nails, I started off with a base of the blue, then freehanded horizontal stripes with the green, using the bottle from the brush. They weren't neat or perfect, but it didn't matter because for the next step I outlined the stripes (once fully dry) with the pink pen, to make the stripes seem more straight/uniform. I used the white to add similar detail to the manicure that inspired me, but tried to mix it up a bit too so it wasn't directly copied! I then topcoated these to seal in the pen.
For my two accent nails (little finger and thumb) I used two coats of Greenberry, and one coat of Beauxbatons Academy by Lac Attack. I thought the colours in this were really Easter-y and went well with the manicure. I finished these nails off with a pastel pink stud, stuck on while the polish underneath was still wet then sealed in with topcoat.
I was quite pleased with the results - the tribal/easter print isn't perfect and a bit wonky in places but if you don't look too closely, it's not too obvious and the overall effect is quite nice and colourful!
Check out Naileymabob's post and nails here - they're fab!


.JPG)