Hello!
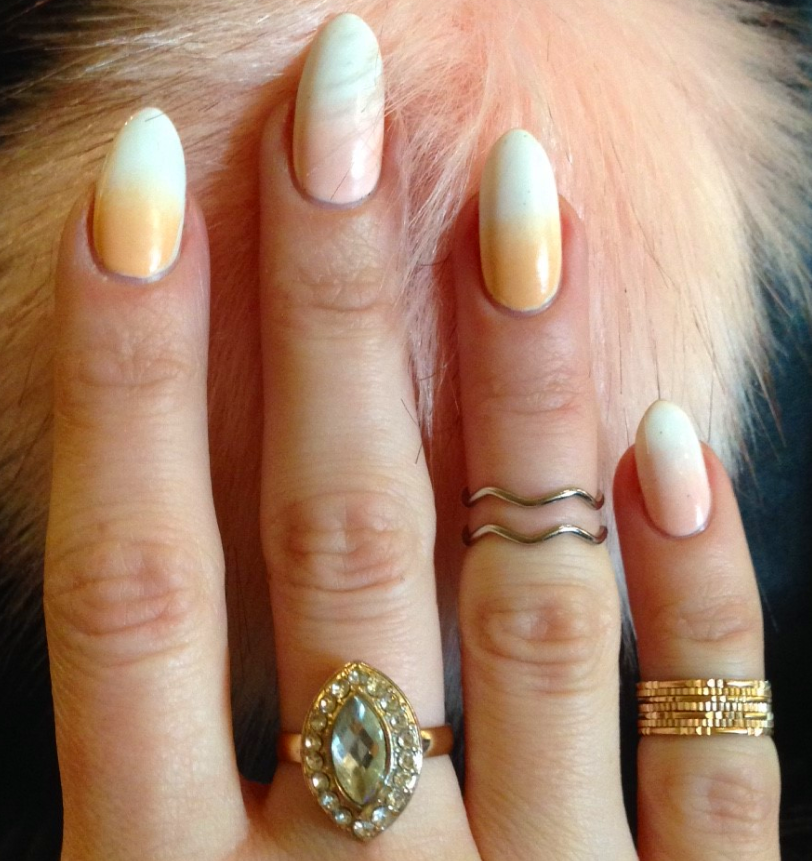
I'd planned an exciting tribal-print mani to wear over the weekend, and started off with a pastel gradient in peach/white and pink/white as the base. However, my attempts at tribal went wrong and I didn't have the time or patience to keep at it, so my nails just had the plain gradient on all weekend. I actually really liked them - I love gradients and I always want to wear plain/white-ish nails but always end up adding something, so I'm kind of glad I didn't this time!
The polishes are all Models Own - the white is Snow White, the pink is Strawberry Tart and the peach is Peach Melba. These are gorgeous colours and perfect for gradients! I used my usual method for the gradient - I started off with a base of the lightest colour - white in this case. Once dry, I painted a strip of white and a strip of colour onto a make-up sponge. I sponged this onto my nail and repeated several times to build up the colour. I topcoated with Sally Hansen Insta-Dri!
Hello!
Quick post today to show a manicure that I did last week. My sister bought me this double-sided nail polish when it went down in the sale in the shop where she works to less than £1! She knows me well :-D
I've never actually heard of this make before, which is 'Technic' but I reckon it's a budget brand which seems similar to W7 etc.
I started off with two coats of the pink. It applies nicely and I loved the shade! I then painted on a gradient using the gorgeous multi-coloured glitter. I loooove this glitter, it's so nice, and I don't think I would have paired it with hot pink if it hadn't come with it, so I'm glad I did try it as I think it looks great.
I think this really shows that you don't have to spend a lot on polish or buy expensive brands to have nice looking nails, the cheaper brands can often be just as nice!
Hello!
As you'll probably know, Models Own recently released a set of metallic polishes named Chromes. Also, they've just had a big 50% sale on their website (last day today!) so I had to get a couple while they were reduced to give them a try, as the swatches I'd seen were beautiful! After looking at a lot of swatches I decided to treat myself to two - couldn't afford or justify any more but I like treating myself to a couple from new collections if I like them enough! I got Rose which is rose-gold coloured, and Indigo which is purply-blue.
They came this morning, and I immediately got Rose on my nails!
The polish is tricky to apply to get a nice finish and you have to take extra care. It's apparently best to not use basecoat or topcoat, so I left these out. I also buffed my nails before applying to make them as smooth as possible. I then added two coats of Rose. The polish is such a nice consistency, and the brush is wide and flat. It looks quite "brush-strokey" when first applied, but luckily this fades a bit as the polish dries. Still, it's important to apply it as neatly and smoothly as possible - I tried to do just three strokes of the brush per nail.
It does show up imperfections of the nail below, but I don't think this ruins the overall effect unless you look too closely. My nails look like they're metal! I love this shade, and will probably add some art over the top using my other new chrome shade.
It was also hard to photograph - below are some taken on my phone (without flash) and camera (with).
Hello!
Last night me and my mum went to see Sing-a-long-a Sound Of Music at our local theatre! Basically, they just show the film on a big screen, and show the words for all the songs encouraging everyone to sing along. You're also encouraged to shout/cheer at various points in the film, and you're given a little goodie bag of props, such as a party popper to let off when Maria and Captain Von Trapp kiss! It was so much fun!
A lot of people dressed up, but me and mum didn't want want to go too mad. We wore Von Trapp t-shirts (previously bought from the stage production in London) and "Warm Woollen Mittens" like out of the Favourite Things song, and also we decided to do music note nails for the occasion!
My first attempt/idea went wrong, so I had a google for music note nail art, and found a design similar to the one I've done but in pink. I recreated it on myself in a minty shade, which is Sugar Apple by Barry M. The glitter is from the Barry M glitterati collection, and the black is my Barry M nail art pen and done by hand. Here's the finished mani:
Then I recreated it exactly for my mum! It was awesome to have matching manicures!!
Here's a picture from the night when some of the dressed-up people went on stage to show off their outfits:
Hello!
I recently heard that Miss Sporty (a budget brand available in Superdrug and Boots) had a "peel-off base coat" available in their range. I've seen other people use these, and basically they're intended to be used as a base under polish that would be hard to remove, like glitter polish. I always have a nightmare taking off glitter polish, even using acetone it can take ages and get everywhere, so I really wanted to see whether these peel-off base coats could help.
The base coat was £2.29 and comes in an 8ml bottle.
I'd read that using PVA glue as a base coat is a way of creating your own peel off base, and after purchasing my bottle of Peel-Off Base from Miss Sporty I realised this is basically what I had bought, judging from the smell and consistency. This didn't really bother me though, as I would never have gone to the trouble of getting some PVA glue and putting it into an old polish bottle, so as long as this base coat worked, I was still happy with the purchase. Here it is on my nails (they're a bit stained I know!) ...you can see it's not fully dried on my middle nail and is still a bit white.

However, I didn't get along with it at all! I started with a generous coat of the base coat like the bottle suggests, then waited until it dried and went clear (above). After this, I began to paint my nails pink, but almost immediately the polish started to kind of crackle, as if it was somehow reacting with the base coat below. It was very strange, and very ugly looking! Perhaps I didn't wait long enough for the base to dry, but it definitely felt dry to the touch and had gone clear, as stated on the outside of the bottle. As you can see in the photo below, I didn't even finish all of my nails because I hated how it looked! (don't ask why I didn't paint them in order?!)
I obviously now wanted to remove the polish, but it didn't seem to "peel off" like I thought it would - like in one go. Instead I kind of rubbed at it with a tissue and it did kind of come off that way, but left polish around the edges of my nails, and my nails were partially covered in gloopy base coat!
If anyone has any suggestions as to where I went wrong please share them, but otherwise I won't be recommending that anyone buy this base coat (or, tiny pot of glue!!) and I will just continue using acetone to remove my polish - at least it works!
Hello!
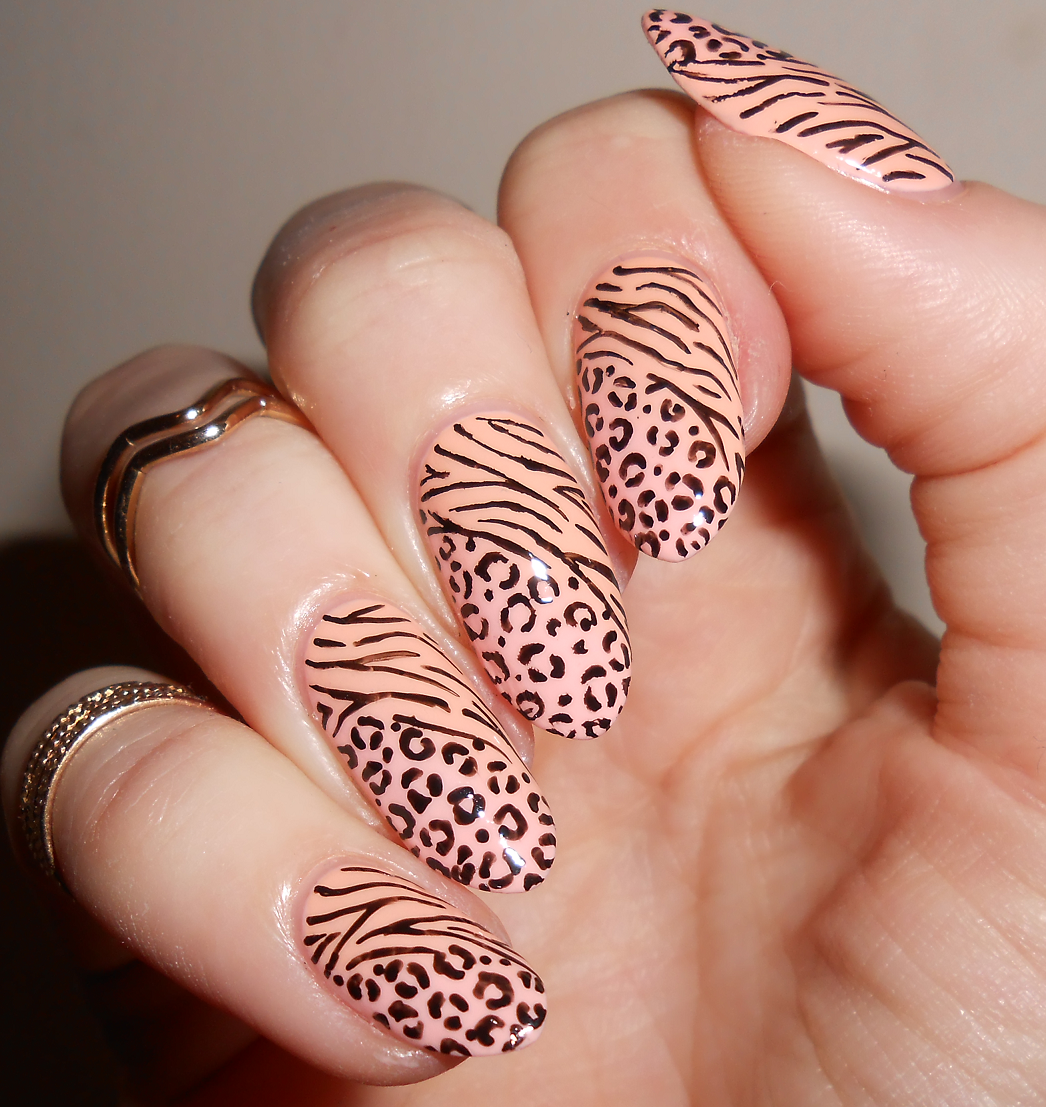
I loooove doing leopard print on my nails, it's so simple, doesn't have to be perfect and looks so effective! I was inspired to do this design by a few different manicures I'd seen on Instagram, where nail artists had used leopard print and zebra print together.
I started off with a gradient using Peach Melba & Strawberry Tart by Models Own from their Fruit Pastel Scented range. To create the gradient, I painted my nails with the pink shade first, and let it dry. I then painted both of the colours onto a makeup sponge side-by-side, and sponged them diagonally onto each nail. I had to sponge a couple of times on each nail (leaving about a minute between each layer) to build up the colours. Still, the effect was quite subtle, but I liked it - it reminded me of sweets!
Once this gradient was dry (helped along with Sally Hansen Insta-Dri) I then got out my trusty black nail art pen by Barry M. I doodled zebra print over the peach, and leopard print over the pink, then topped with more Insta-Dri topcoat to seal in the pen, as it washes off otherwise.
I looooove how these turned out and don't ever want to take them off!!Also, they had a delicious smell of fruity sweets due to the scented polish. Yum!
Quick post today to show the nails I did earlier this week. They were inspired by @decorateddigits on Instagram who did the same design and it looked lovely on her pointed nails so I wanted to give it a go myself!
I started off by painting my nails a nude shade. I used two coats of Utopia by Models Own. This is my favourite nude shade along with Lychee by Barry M. I then painted the tips white, then once dry I used the black Barry M nail art pen to draw on the black stripes. I then used a dotting tool and a dark red polish by Nails Inc to make red blobs which were supposed to be the roses, along the line where the stripes and the nude met. I also added 'petal' details to the blobs to make them look more rose-like, but I wasn't happy with them - I wish I had picked a red that was less dark, like in the image I was using for inspiration, and that my roses were neater in general!
Here's the outcome, I didn't like them because I didn't think they looked as nice as the version I was trying to replicate, but I did get quite a few nice comments on them, both on Instagram and while out shopping so that was a bonus!